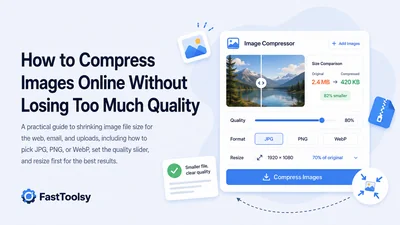
Large image files slow down web pages, bounce off email attachment limits, and get rejected by upload forms. The good news is that most photos carry far more data than the screen ever shows, so you can cut the file size dramatically while keeping a result that still looks clean. This guide walks through a repeatable workflow for shrinking images, and you can follow along with the free Image Compressor as you go.
Why image files are bigger than they need to be
A photo from a modern phone can easily be several megabytes and 4000 pixels wide. A blog post, product listing, or email rarely displays an image wider than 1200 to 1600 pixels, so most of that data is invisible to the reader. File size is driven by three things you can control: the pixel dimensions (width and height), the format (JPG, PNG, or WebP), and the compression quality setting. Adjusting these in the right order is what lets you keep quality where it matters while throwing away the bytes nobody sees.
Step 1: Resize before you compress
Resizing is the single most effective way to reduce file size, because it removes pixels you do not need. Halving the width and height of an image cuts the pixel count to a quarter, which usually shrinks the file far more than compression alone.
- Decide where the image will be used and pick a target width: roughly 1200–1600px for full-width web images, 600–800px for in-content photos, and smaller for thumbnails.
- Open the Image Resizer and set the target width, keeping the aspect ratio locked so the photo is not stretched.
- If the image is for a specific platform, use a preset instead of guessing — for social posts, the Resize Image for Instagram tool gives you the right dimensions in one click.
- Save the resized version, then move on to compression.
Step 2: Choose the right format (JPG vs PNG vs WebP)
Format choice has a big impact on both quality and size. Matching the format to the type of image is half the battle.
JPG
Best for photographs and detailed images with lots of colour and gradients. JPG uses lossy compression, which discards subtle detail to save space, and it does not support transparency. It is the safe default for most camera photos.
PNG
Best for graphics with sharp edges, flat colour, text, logos, and anything that needs a transparent background. PNG is lossless, so it preserves crisp lines, but photographs saved as PNG are usually much larger than the JPG equivalent.
WebP
A modern format that often produces smaller files than JPG or PNG at a comparable quality, and it supports transparency. It is widely supported in current browsers, which makes it a strong choice for the web. You can turn an existing JPG or PNG into this format with the Convert Image to WebP tool.
Step 3: Use the quality slider deliberately
For lossy formats like JPG and WebP, the quality setting decides how aggressively detail is discarded. Lower numbers mean smaller files and more visible artefacts; higher numbers mean larger files and cleaner detail.
- Around 80–85%: a sensible starting point for most photos — a big size cut with little visible loss.
- Around 70–75%: good for thumbnails and background images where small flaws will not be noticed.
- 90% and above: reserve this for hero images or photos with fine gradients (skies, skin tones) where banding would be obvious.
Compress, preview the result at the size it will actually appear, and only raise the quality if you can genuinely see a problem. Re-saving a JPG many times stacks up compression damage, so always start from the original file rather than a file you already compressed.
Step 4: A repeatable compression workflow
- Start from the original, full-resolution file.
- Resize to the largest size the image will be displayed at.
- Pick the format: JPG or WebP for photos, PNG or WebP for graphics and transparency.
- Open the Image Compressor, drop in the file, and set the quality slider to about 80%.
- Preview, compare against the original, and nudge the quality up or down until the size and look are both acceptable.
- Download and check the final file against any size limit the destination enforces.
Common targets and quick tips
- Email attachments: aim well under the provider's limit; resizing to 1200px and compressing to ~80% usually does it.
- Web pages: keep most in-content images under a few hundred kilobytes so pages load fast.
- Upload forms with strict caps: resize first, then lower the quality in small steps until you are under the limit.
- Logos and screenshots with text: prefer PNG or WebP so edges stay sharp.
- Need a clean cut-out first? Remove the background with the Background Remover before resizing and compressing.
Related tools & toolkits
Pair the compressor with the Image Resizer to fix dimensions, the Convert Image to WebP tool for smaller modern files, the Resize Image for Instagram tool for social posts, and the Background Remover for clean cut-outs. Everything lives together in the Image Toolkit, and you can browse the rest under All Toolkits or from the FastToolsy homepage. To resize and shrink in one go, follow the Compress and Resize Images workflow.
Frequently Asked Questions
Does compressing an image always reduce its quality?
Not noticeably, if you do it carefully. Resizing removes pixels you do not display, which often saves the most space with no visible loss. Lossy compression around 80–85% trims detail the eye barely registers. Quality only suffers visibly when you push the slider very low or re-compress an already-compressed file repeatedly.
What is the best format for compressing photos online?
For photographs, JPG is a reliable default and WebP usually produces an even smaller file at a similar quality. Use PNG only when you need a transparent background or perfectly sharp edges, such as logos and text graphics, since photos saved as PNG tend to be much larger.
Should I resize an image before or after compressing it?
Resize first. Reducing the pixel dimensions to the size the image will actually be shown removes the bulk of the unnecessary data, and then compression cleans up the rest. Doing it in this order gives the smallest file with the best-looking result.
Are my photos uploaded anywhere when I compress them?
The Image Compressor uses the browser's Canvas API, so your photos are compressed on your device and are not sent to our servers.
Why does my file barely shrink when I compress it?
Usually because the image is still at full resolution, or it is a PNG photo that should be a JPG or WebP. Resize to the display width first, switch a photo to JPG or WebP, and then lower the quality slider in small steps until the size drops to where you need it.
كيف تضغط الصور أونلاين دون فقدان كبير في الجودة
الصور كبيرة الحجم تبطئ صفحات الويب وتتجاوز حدود مرفقات البريد وقد ترفضها نماذج الرفع. والخبر الجيد أن معظم الصور تحمل بيانات أكثر بكثير مما تعرضه الشاشة فعلاً، لذا يمكنك تقليل حجم الملف بدرجة كبيرة مع الإبقاء على نتيجة تبدو نظيفة. يشرح هذا الدليل سير عمل قابلاً للتكرار لتصغير الصور، ويمكنك تطبيقه مباشرة باستخدام أداة ضغط الصور المجانية.
غيّر أبعاد الصورة قبل الضغط
تغيير الأبعاد هو أكثر طريقة فاعلية لتقليل حجم الملف، لأنه يحذف وحدات البكسل التي لا تحتاجها أصلاً. تقليل العرض والارتفاع إلى النصف يخفض عدد البكسل إلى الربع، وهذا غالباً يصغّر الملف أكثر من الضغط وحده. حدد مكان استخدام الصورة واختر عرضاً مناسباً: نحو 1200 إلى 1600 بكسل للصور العريضة على الويب، و600 إلى 800 بكسل للصور داخل المحتوى. يمكنك ضبط العرض بسهولة عبر أداة Image Resizer مع تثبيت نسبة الأبعاد حتى لا تتشوه الصورة.
اختر الصيغة المناسبة: JPG أو PNG أو WebP
تختلف الصيغ في تأثيرها على الجودة والحجم. صيغة JPG هي الخيار الأفضل للصور الفوتوغرافية الغنية بالألوان والتدرجات، بينما تناسب PNG الرسومات ذات الحواف الحادة والنصوص والشعارات والخلفيات الشفافة. أما WebP فهي صيغة حديثة تنتج عادة ملفات أصغر بجودة مماثلة وتدعم الشفافية، ويمكنك تحويل أي صورة إليها عبر أداة Convert Image to WebP.
اضبط شريط الجودة بوعي
في الصيغ ذات الضغط المفقود مثل JPG وWebP، يحدد شريط الجودة مدى التضحية بالتفاصيل. ابدأ بنحو 80 إلى 85 بالمئة لمعظم الصور، فهي نقطة توازن جيدة بين الحجم الصغير والفقد القليل في الجودة. اعرض النتيجة بالحجم الذي ستظهر به فعلاً، ولا ترفع الجودة إلا إذا رأيت مشكلة واضحة. ابدأ دائماً من الملف الأصلي بدل ملف سبق ضغطه حتى لا يتراكم تلف الضغط، ثم افتح أداة ضغط الصور وأسقط الملف فيها واضبط الشريط ثم نزّل النتيجة.
نصائح سريعة لأهداف شائعة
لمرفقات البريد، التزم بحد أقل بكثير من حد المزود، وعادةً يكفي تغيير الأبعاد إلى 1200 بكسل والضغط إلى نحو 80 بالمئة. لصفحات الويب، أبقِ معظم الصور تحت بضع مئات من الكيلوبايت ليكون التحميل سريعاً. وللشعارات ولقطات الشاشة التي تحوي نصاً، فضّل PNG أو WebP حتى تبقى الحواف حادة. وإذا احتجت قصّ الخلفية أولاً، استخدم أداة Background Remover قبل تغيير الأبعاد والضغط.
الأسئلة الشائعة
هل يقلل الضغط جودة الصورة دائماً؟
ليس بشكل ملحوظ إذا تم بعناية. تغيير الأبعاد يحذف بكسل لا تعرضه أصلاً فيوفر مساحة دون فقد ظاهر، والضغط عند 80 إلى 85 بالمئة يزيل تفاصيل لا تكاد العين تلحظها. تظهر مشكلة الجودة فقط عند خفض الشريط كثيراً أو إعادة ضغط ملف مضغوط مراراً.
ما أفضل صيغة لضغط الصور أونلاين؟
للصور الفوتوغرافية، JPG خيار موثوق وWebP غالباً ينتج ملفاً أصغر بجودة مماثلة. استخدم PNG فقط عند الحاجة إلى خلفية شفافة أو حواف حادة جداً مثل الشعارات والنصوص.
هل أغيّر الأبعاد قبل الضغط أم بعده؟
غيّر الأبعاد أولاً. تقليل الأبعاد إلى الحجم الذي ستظهر به الصورة يزيل معظم البيانات غير الضرورية، ثم يأتي الضغط لتنظيف الباقي، وهذا الترتيب يعطي أصغر حجم بأفضل مظهر.
هل تُرفع صوري إلى أي مكان عند ضغطها؟
تعمل أداة ضغط الصور باستخدام واجهة Canvas في المتصفح، لذا تُضغط صورك على جهازك ولا تُرسل إلى خوادمنا.