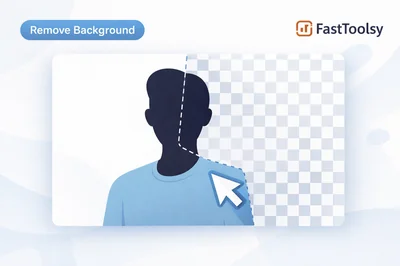
If you searched for remove bg, you probably want one thing: a clean cutout of your subject with a transparent background you can drop into a product listing, a profile photo, a slide, or a design mockup. FastToolsy’s Remove Background tool does that in the browser, so you can upload an image, let the detection run, and download a transparent PNG in moments.
This guide shows how to use FastToolsy to remove bg quickly, how to improve results when edges look rough, and when a “good enough” automatic cutout needs a different approach. You’ll also see common mistakes, edge cases, and two mini-examples you can copy as a workflow.
Quick answer: background removal in FastToolsy
Open the FastToolsy Remove Background page, upload or drag your image, wait for processing, then download the result as a transparent PNG. If you want a solid color instead of transparency, use the “Add Background Color” option before downloading.
What remove bg usually means in practice
People use the phrase remove bg for a few slightly different goals. Sometimes you want true transparency so the subject can sit on any background. Other times you want the background replaced with a clean white or a brand color. And sometimes you want the same cutout but at different sizes for web and mobile.
In keyword tools you’ll also see variations like background remove and bg remove. They typically point to the same core job: isolate the subject while keeping edges natural. FastToolsy focuses on speed and privacy by processing in the browser.
Step-by-step: using FastToolsy to remove a background
-
Go to Remove Background.
-
Drag and drop a JPG or PNG, or click to select a file.
-
Wait while the tool analyzes the subject and background.
-
Preview both the original and the “Background Removed” result.
-
Download as PNG to keep transparency, or choose a background color first if you need a solid fill.
That’s the basic workflow. The rest of this article is about getting consistently great cutouts, especially when the first pass looks imperfect.
Advanced tips to remove bg cleanly
To get a clean cutout, the tool needs to decide which pixels belong to the foreground subject and which belong to the background. Most modern removers use segmentation: they estimate a mask around the subject, then refine the edges so hair, soft fabric, and thin objects don’t look jagged.
You don’t need to understand the algorithms to improve outcomes, but you do need to know what confuses them: low contrast, complex patterns, and motion blur. If your photo has a clear subject/background separation, you can often remove bg in a single pass.
Best input photos for clean cutouts
If you want a high-quality result with minimal artifacts, start with the best possible input. These quick improvements help more than most people expect:
-
Use contrast: dark subject on light background or vice versa.
-
Avoid busy textures: patterns behind hair or transparent objects make edges harder.
-
Keep the subject sharp: blur forces the mask to guess where edges end.
-
Frame the subject: leave a little breathing room around the subject so the detector sees context.
When you upload a clean photo, you can remove bg quickly and the transparent PNG will look natural when placed on a new background.
Common mistakes that lead to poor results
Most disappointing outcomes happen for predictable reasons. If the subject looks clipped, check these first:
-
Low contrast: a white shirt on a white wall often produces missing edges.
-
Backlit hair: bright halos can cause the mask to include background glow.
-
Transparent objects: glass and veils confuse detectors because background shows through.
-
Tiny subjects: if the subject is only a small part of the frame, the tool may pick the wrong focus.
-
Heavy compression: blocky JPEG artifacts create fake “edges” that the mask may keep.
Fixing these usually means using a better photo or a different crop and trying again. When in doubt, crop tighter, increase contrast slightly, and try to remove bg again.
Edge cases and how to handle them
Hair, fur, and soft edges
Hair is the classic test for background removers. If your result looks crunchy, try a higher-resolution image and avoid backgrounds with a similar color to hair. If you must use a busy background, consider placing the subject on a slightly darker fill after you remove bg so small artifacts are less noticeable.
Logos and flat graphics
For logos, the goal is crisp edges, not feathering. Use a high-resolution PNG when possible. If you only have a low-res JPG, cropping tight around the logo can help the detector separate foreground from background without leaving a halo.
Products with white backgrounds
White-on-white is tricky. If you are doing bg remove for ecommerce, shoot products on a slightly off-white or light gray background so edges are visible. Then add a pure white background color for marketplace compliance.
Shadows you want to keep
Some product photos look better with a soft shadow for realism. Automatic removal may remove the shadow along with the background. One workaround is to add a subtle shadow later in your design tool. If you need the original shadow preserved perfectly, you may need manual editing.
Mini-example 1: ecommerce product photo
Goal: turn a phone photo of a mug into a marketplace-ready image.
-
Take the photo with a simple background and strong side lighting.
-
Upload it to FastToolsy and remove bg.
-
Check the rim and handle edges. If they look rough, recrop tighter and remove bg again.
-
Use “Add Background Color” to set the background to white.
-
Download the PNG and upload it to your product listing.
This is the practical version of erase background free: you skip expensive software and still get a clean, consistent catalog look.
Mini-example 2: profile photo for a resume or portfolio
Goal: keep your face sharp and replace a distracting background with a calm brand color.
-
Choose a photo with clear separation between your hair and the background.
-
Upload and remove bg.
-
Zoom in on hair and glasses edges. If you see halos, try a different photo with more contrast and remove bg again.
-
Add a subtle background color that matches your portfolio theme.
-
Download and reuse the same cutout across LinkedIn, your CV, and your site.
For many users, this is a fast path to a professional look without paying for a free background remover subscription or installing desktop software.
File formats, transparency, and quality
Background removal workflows often fail at the export step, not the cutout step. If you need transparency, PNG is the safe choice because it supports an alpha channel. JPEG does not support transparency, so exporting a cutout as JPEG will force a solid background color.
If your destination supports transparency but you want smaller file sizes, keep the PNG as your master and create smaller derivatives for web delivery. A simple rule: master first, optimized copies second. That way, if you ever need to remove bg again from the original, you can do it without stacking compression artifacts.
Resolution matters too. If you are using the cutout in a small UI card, you do not need a 4000px image. Resizing before or after removal can make everything faster, and it can reduce jagged edges caused by compression artifacts.
Why remove bg matters for consistent branding
When every image has a different background, your page looks messy even if each photo is “good.” Clean cutouts let you standardize: same background color, same spacing, same shadow style, and the same overall tone. This is one of the biggest reasons ecommerce teams make remove bg a first step.
It also helps with reuse. A single cutout can appear on a product page, a carousel ad, an email banner, and a slide deck. That reuse is where time savings compound, because you remove bg once and repurpose the asset everywhere.
Quality checklist before you download
Before you finalize the PNG, do a quick pass. It takes 20 seconds and avoids rework later:
-
Edges: look at hair, fingers, and thin objects.
-
Halos: check for a bright outline that will show on dark backgrounds.
-
Missing parts: watch for clipped straps, handles, or earrings.
-
Background noise: ensure the background is fully transparent and not a faint tint.
If something looks off, it’s usually faster to adjust the input (crop, pick a better photo) and remove bg again than to “fix” the output after the fact.
Common workflows: where people use results
Once you can reliably remove bg, you start seeing it everywhere:
-
Product listings and ads: consistent backgrounds increase trust and reduce visual clutter.
-
Presentations: place people or objects on clean slides without the original photo environment.
-
Social posts: make cutout stickers and layer them over gradients or patterns.
-
Thumbnails: isolate the subject so it remains readable at small sizes.
-
Docs and PDFs: insert clean visuals into proposals and manuals.
If you work in templates, the benefit is even bigger: you can remove bg once, then swap backgrounds and layouts without touching the subject again.
Privacy and performance: what happens to your image
FastToolsy’s Remove Background page states that your image is processed in your browser and nothing is uploaded to any server. That matters if you are working with client assets, unreleased products, or personal photos. You can remove bg while keeping the file on your device.
Performance still depends on your device and the image size. Large photos take longer to analyze. If you want speed, resize first—especially when you only need a web-sized image—then remove bg on the smaller version.
Accuracy note: limitations you should expect
Automatic removal is strong, but it’s not perfect. If the subject and background share the same color or the photo is extremely noisy, the mask will guess. For mission-critical work (fine jewelry chains, transparent glass edges, smoke), you may need manual retouching after you remove bg.
Think of FastToolsy as a fast first pass. In most everyday scenarios, you’ll get a clean result immediately. In the hardest edge cases, you’ll save time by starting with an automatic background remove and then finishing in a dedicated editor only if necessary.
A good habit is to treat the output like a draft: preview it on a couple of backgrounds, and if it fails the test, change the input photo rather than spending time trying to “repair” the mask.
Troubleshooting: quick fixes that usually work
My subject is cut off
If the tool cut off part of the subject, it’s usually because the subject blends into the background. Try a different image, or crop tighter so the subject dominates the frame, then remove bg again.
I see a white halo
Halos appear when the background is bright and light “bleeds” into the subject edges. Use a different photo with less backlight, or choose a slightly darker background color so the edge blends naturally after you remove bg.
The output looks jagged
Jagged edges often come from low-resolution images. If possible, start with a larger image, or avoid heavy compression. Then remove bg again and compare results across different crops.
The tool picked the wrong subject
If your image has multiple people or objects, the detector may choose the most prominent one. Crop to focus on what you want to keep, then remove bg again.
When to remove bg and when to keep the original background
Not every photo benefits from a cutout. Lifestyle images often need context: a chair in a room, a chef in a kitchen, a person outdoors. In those cases, trying to remove bg can make the image feel artificial, and you may lose cues like scale or environment.
On the other hand, if the background distracts from the subject, a cutout is usually the right call. A quick test is to shrink the image mentally. If the subject gets lost, you’ll get more clarity when you remove bg and place the subject on something clean.
Teams often mix both approaches: lifestyle photos for storytelling and cutouts for consistency. The skill is choosing the right tool for the job, not forcing every image into the same mold.
Marketplace checklist for ecommerce cutouts
If you sell on marketplaces, “looks good” is not the only requirement—some categories have strict guidelines for backgrounds, margins, and framing. Use this checklist to avoid rework:
-
Crop: keep the product centered with a small margin so edges stay intact.
-
Edge review: zoom in on handles, straps, and corners after you remove bg.
-
Background choice: if a white background is required, add it after you remove bg instead of trying to shoot perfect white in-camera.
-
Consistency: reuse the same background color and spacing across your catalog.
Following this sequence reduces the common “why do my products look different?” problem, especially when multiple photos are taken on different days or devices.
Preparing images before removal
A small amount of prep can dramatically improve the cutout. If your photo is dark, brighten it slightly so the subject stands out. If there’s heavy noise, choose a cleaner image if possible. The idea is simple: the clearer the edge, the easier it is to remove bg cleanly.
Also consider straightening and correcting perspective before removal. A product shot that is slightly tilted will still be tilted afterward, and it can look odd on a perfectly clean background.
How to sanity-check your PNG on different backgrounds
A cutout can look perfect on a white preview and still look wrong on a dark banner. After you remove bg, test the PNG on three backgrounds: white, dark gray, and a saturated brand color. Each one reveals different issues—white shows missing edges, dark shows halos, and saturated colors show fringing.
If you see fringing, try a different input photo with clearer separation. When the edge is right on all three backgrounds, you can use the cutout confidently across ads, slides, and product pages.
Batch habits: staying fast without sacrificing quality
Even if you’re only processing a small catalog, batching saves mental energy. Create a simple order: crop, remove, export. Doing the same step repeatedly reduces mistakes and makes results more consistent.
Another time-saver is naming. Download with a predictable pattern such as product-name-transparent.png. Consistent filenames make it easier to reuse assets in templates, marketplaces, and design systems.
If you later want smaller files, generate optimized versions for your website while keeping the transparency master safe for future edits.
Use cases by role: designers, sellers, and students
Designers and marketers
Design teams use background removal to create clean assets for ads, landing pages, and thumbnails. It’s especially useful for quickly testing layouts: cut out the product, drop it on a hero section, and iterate. When a concept is approved, you can decide whether to keep the automated cutout or refine it.
Ecommerce sellers
Sellers care about speed and consistency. With a repeatable pipeline, you can standardize product photos across a catalog. Combine removal with resizing and compression so images load fast and look uniform.
Students and job seekers
For portfolios and class projects, a clean subject cutout can elevate posters, reports, and slide decks. If you need a quick headshot or project image, this approach is an easy upgrade without learning advanced software.
Choosing a background color after removal
Once you have a transparent cutout, the background becomes a design choice. For marketplaces, pure white is common because it looks clean and matches listing guidelines. For brands, a soft neutral or a light tint can feel more premium than stark white, especially for lifestyle-oriented products.
Pick colors intentionally. A slightly darker background can hide tiny edge artifacts, while a very saturated color makes halos obvious. If you’re building a consistent set of assets, decide on one or two background colors and reuse them across your images so the catalog feels unified.
If you’re unsure which color fits your brand, use a palette tool to sample colors from your website or logo and keep everything aligned.
One more practical tip: export two versions when you can. Keep a large master for future edits, then create a web-sized copy for faster loading. This avoids repeated compression and keeps your edges cleaner when you repurpose the same asset across different layouts.
Related FastToolsy tools that pair well
Background removal is usually one step in a larger pipeline. These FastToolsy utilities are commonly used next:
-
Color Picker & Palette Generator for choosing a clean brand background color.
-
Currency Converter when you’re building international listings and pricing assets.
-
Base32/Base58 Encoder & Decoder for quick encoding tasks in dev workflows.
-
Speech to Text if you’re documenting photo workflows and want fast notes.
If you have a photo sitting in a folder waiting for “someday,” open FastToolsy’s Remove Background tool, upload it, and remove bg now. Once you have a transparent PNG, you can reuse that cutout in listings, slides, and social posts without re-editing the same image again and again.
Final takeaway
remove bg is a small task that becomes a big time sink if you do it manually. With FastToolsy, you can get a fast, private, browser-based cutout, then spend your time on the design choices that actually matter: layout, typography, and brand consistency.
Frequently Asked Questions
Does FastToolsy support transparent exports?
Yes. The tool lets you download the processed image as a PNG that preserves transparency, which is ideal for design, ecommerce, and presentations.
What images work best for automatic background removal?
Clear, well-lit photos with strong contrast between the subject and the background usually produce the cleanest edges and the most accurate cutouts.
Why do I sometimes see halos or jagged edges?
Halos often come from bright backlit backgrounds, while jagged edges are commonly caused by low-resolution or heavily compressed images. Using a higher-quality input photo and a tighter crop typically improves results.
Is my image uploaded to a server?
The Remove Background page states that processing happens locally in your browser and nothing is uploaded to any server, which can be helpful for privacy-sensitive images.